
Introduction
At CANDIG, we leverage Docker to streamline the setup of microservices, providing a lightweight and adaptable environment across various platforms. However, using Docker adds a layer of complexity to developers’ workflows. In this blog post, we will explore how Dev Environments can simplify development and streamline the process of creating, running, and sharing code.
Development with Docker: The Challenges
Developing applications using Docker can be challenging, especially when it comes to certain aspects of the development workflow. Here are some common pain points faced by developers:
-
Setting up the Debugger: Configuring the debugger to work seamlessly with a Dockerized application can be complicated, especially with a complex stack like CANDIG, where multiple services need to run simultaneously. Running a single service for debugging might not be enough to trace errors effectively.
-
Slow Testing: Reviewing pull requests or making changes can be time-consuming, as it often involves rebuilding the entire container or stack. This disrupts the current working environment when switching between branches or features. Developers need a faster and more efficient approach to test changes without compromising productivity.
-
Development is Not the Same as Deployment: The development environment often differs from the production environment in various aspects, such as running in debug mode or including specific packages for testing and monitoring dependencies. Customizing the Docker environment manually for specific requirements becomes repetitive when frequently switching between different containers. Developers need a flexible and customizable approach to create their own environments.
Introducing Docker Dev Environments
To address these challenges, Docker introduced a new feature called Dev Environments to simplify the development workflow by providing quick and configurable environments with pre-configured code and tools. Developers can leverage an intuitive GUI to effortlessly launch and manage these containers, reducing the time spent on manual setup and enabling a seamless development experience.
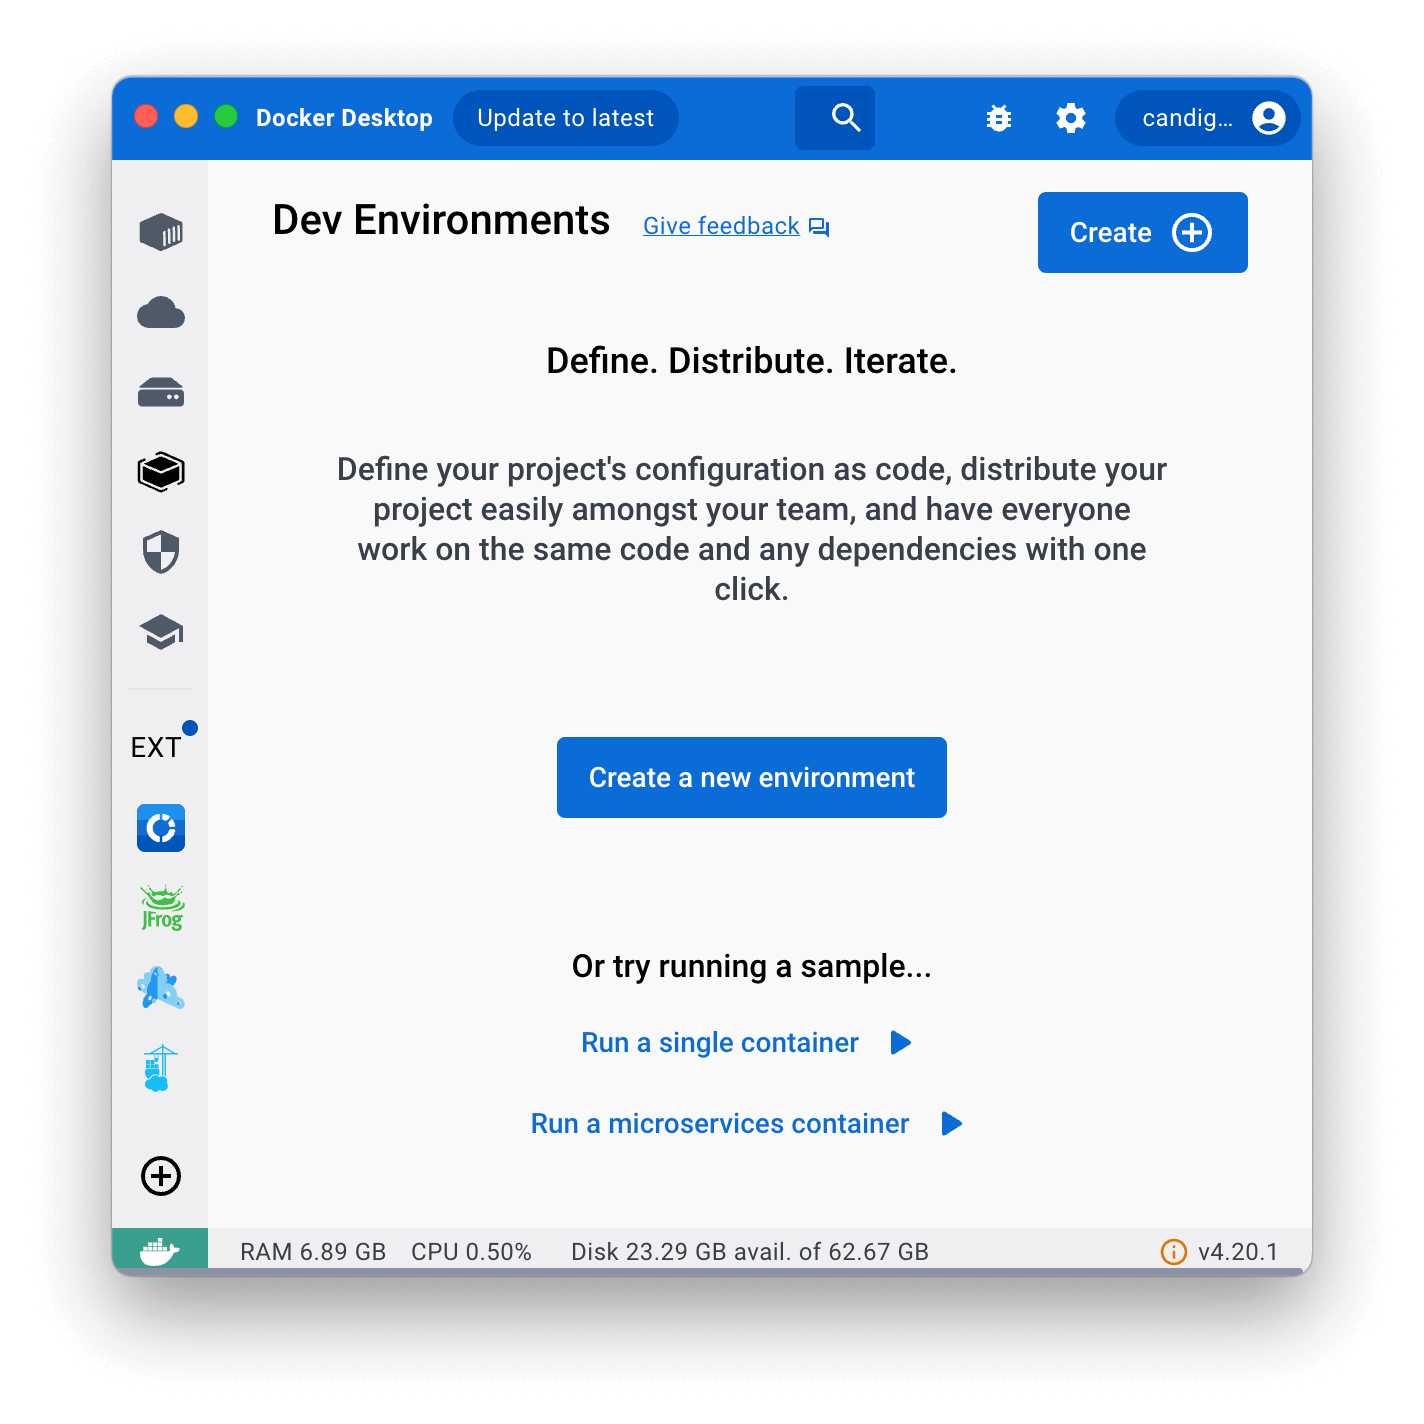
Let’s take a closer look at how it works:
-
Setup Dev Environment: Define your development environment with the necessary services and configurations by creating a
compose-dev.yamlfile. - Running Dev Environment:
- Select the Git repository of your project.
- Choose your preferred Integrated Development Environment (IDE) that supports Docker.
- Open your terminal and run the command
make run. This will launch your application and provide you with a development-ready environment.
- Sharing Dev Environment:
Generate a link using the URL
https://open.docker.com/dashboard/dev-envs?url=followed by the repository link and share it with your team members, allowing them to access the same development environment.
How to Use Docker for Development
You can start by choosing an example that suits your needs. For this guide, we will use the react-express-mysql.
After selecting the example, set up your development environment:
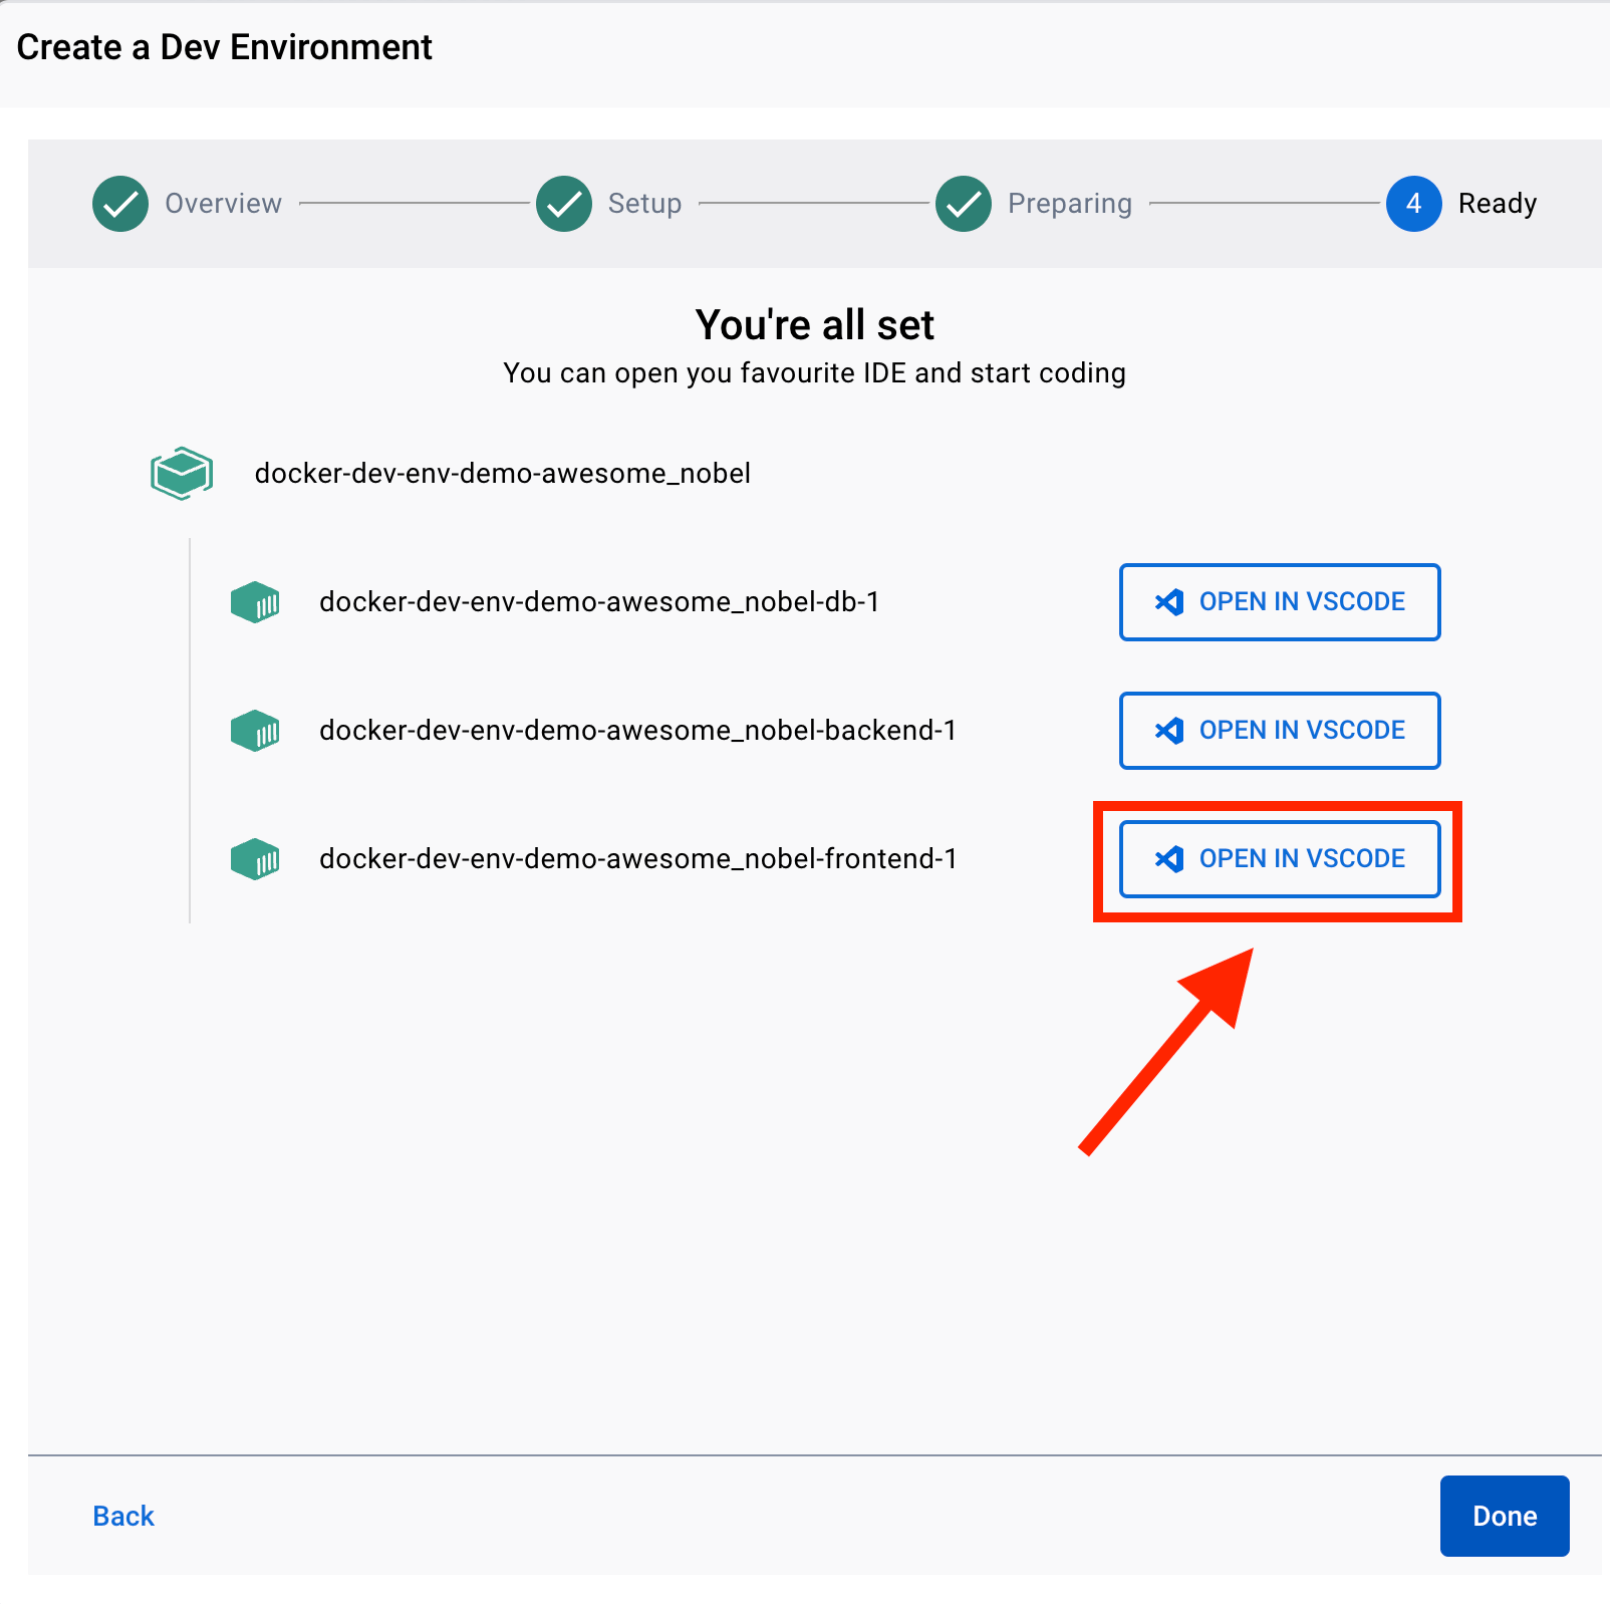
-
Open the project in Visual Studio Code (VSCode).
-
Navigate to the “frontend” folder using the terminal/command prompt:
cd frontend. -
Install the required dependencies:
npm install. -
Start the frontend development server:
npm start.
Now, your frontend is running in development mode. You can make any changes to the code and use git commit or git pull without needing to rebuild the Docker container or the entire stack.
Collaboration with Teammates
If your teammate makes changes to the backend and asks you to review them, you can set up another development environment without affecting your current one.
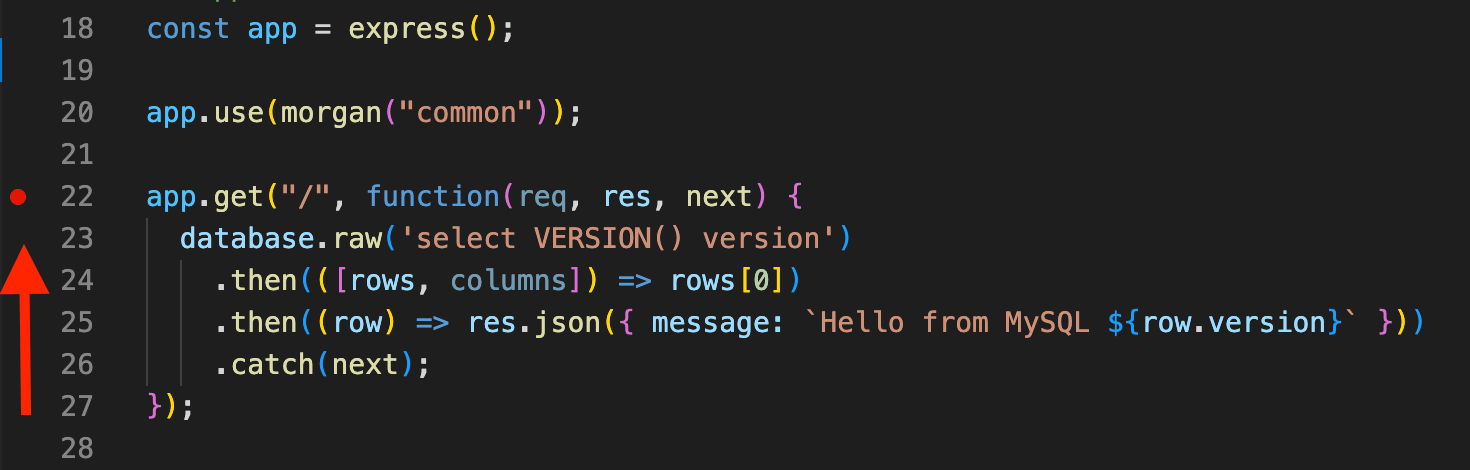
Debugging
-
To debug issues in the frontend, you already have the development environment running from Step 4.
-
For backend debugging, switch your dev environment:
- Make the “backend” folder your working directory:
cd backend. - Install any necessary debugger (e.g., the default built-in JavaScript debugger in VSCode).
- Install the required dependencies:
npm install. - Start the backend server with the debugger:
npm start. - Set breakpoints or use the debugger as needed to investigate issues.
- Make the “backend” folder your working directory:

Once you’re done with debugging, you can shut down the backend environment and return to working on the frontend.
Conclusion
Docker Dev Environments can speed up development with seamless integration and debugging capabilities with IDEs. Additionally, Docker Dev Environments simplify the setup and distribution of development environments, allowing for effortless collaboration and sharing. By leveraging Docker Dev Environments, developers can optimize their workflow, enhance efficiency, and increase productivity.